An ounce of preparation is worth a pound of cure. That’s true in medicine, and that’s definitely true in software development.
Here’s a structured 10-step workflow that will guide you through the app planning process, with the goal of saving you from writing a lot of unnecessary code.
Together, we’ll plan out a simple “To-do” single-page web app. We’ll also plan for an API backend for a future mobile app.
1) Create our Trello board
Trello is a fun, free way to break your planning and development process into small tasks that can be tracked.
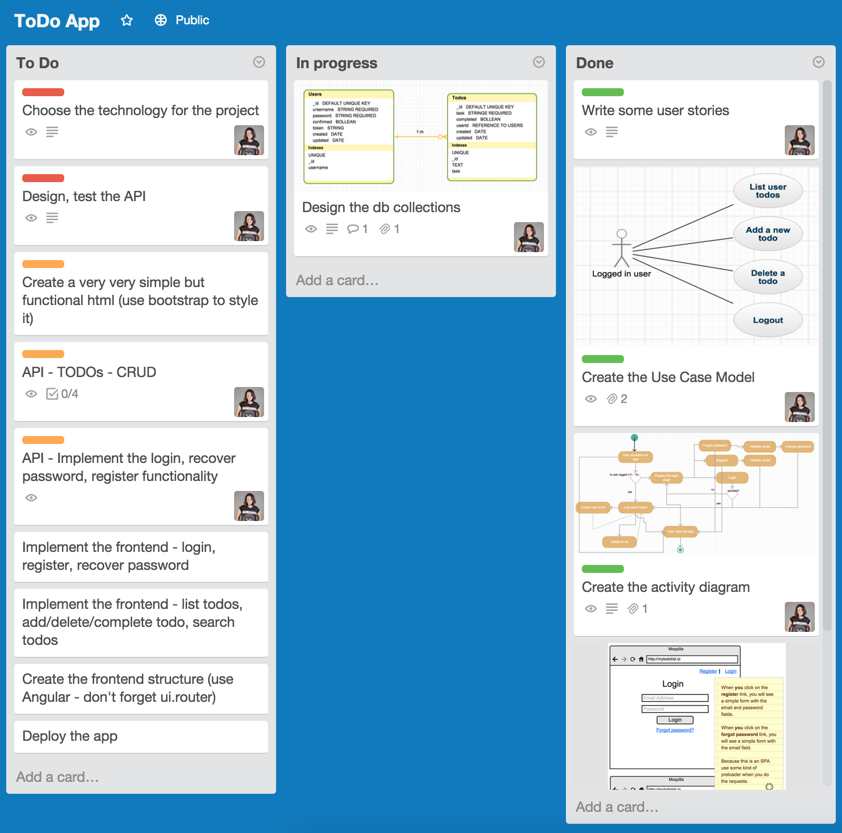
Here’s what our Trello board will eventually look like. I prefer to split my tasks into 3 columns (depending on the complexity of the project):
- To Do - what is left to do
- In progress - tasks that people are currently working on
- Done - tasks that are done and ready for testing
2) Write user stories
Here are some example user stories. These will guide how we think about our app’s features and functionality. Note that they all follow a similar structure: as a [person] I can [do something].
- as a logged-in user I can see the list of my to-do’s.
- as a logged-in user I can add a new to-do.
- as a logged-in user I can delete a to-do (only my to-do’s - not other users’).
- as a logged-in user I can complete a to-do (only my to-do’s - not other users’).
- as an anonymous user, I can register for a new account, recover my password, or log in to the app with an existing account.
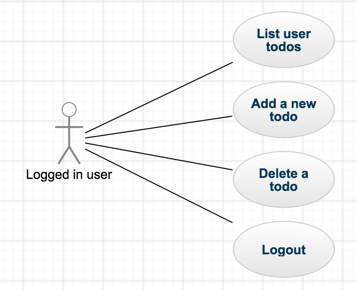
3) Create our user case model
Our user case model will help us visualize our user stories so we can better understand how to implement them.
![Anonymous user case diagram]
4) Create our activity diagram
Our activity diagram will show the different paths our users can take through our app.
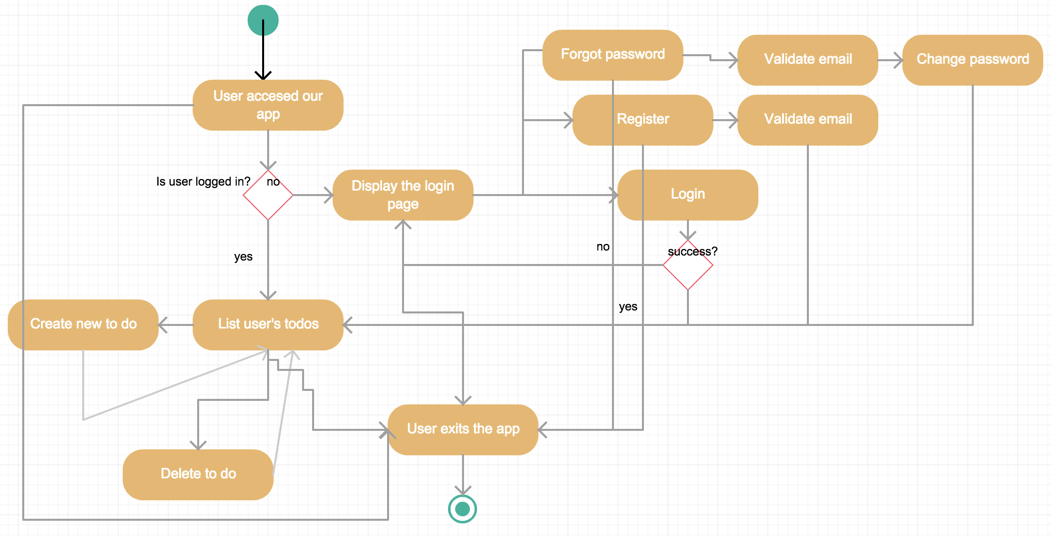
A user accesses our to-do application.
- If the user is not logged in she will see our login page.
- If she already has an account, she can log in.
- If she has an account, but she forgot her password, she can recover her password.
- If she doesn’t have an account, she can create one.
- Both “create an account” and “recover my password” will require email validation. A user can log in to our application only after she has confirmed her email address.
- If she is logged in, she will see her to-do list (this can be empty if she hasn’t added any to-dos yet).
- A logged in user:
- is able to see her tasks list
- is able to mark a task from her list as completed
- is able to search within her task list
- is able to delete a task from her list
- can logout.
- The user can exit the application at any time.
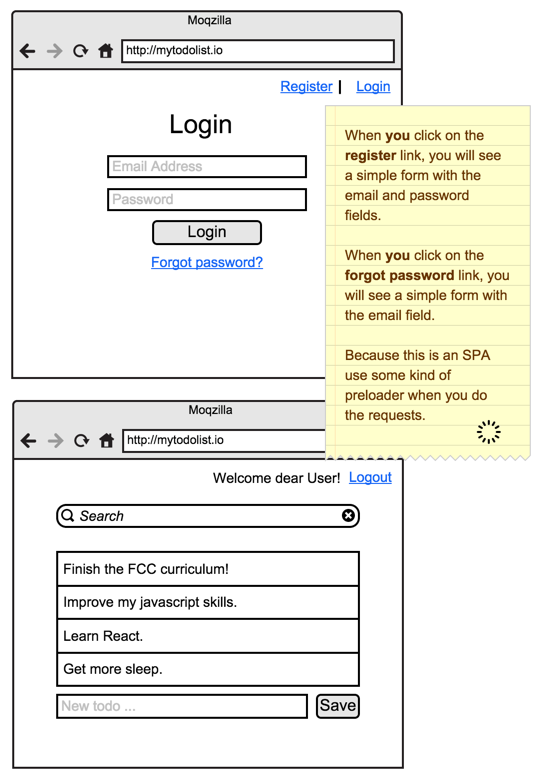
5) Create our mockups
Our mockups show what our app should look like. It’s much faster to iterate on a mockup than it is to do so on working code.
6) Choose the right technologies for our project
Because this is a single page app, we’ll rely heavily - or in this case exclusively - on JavaScript. Let’s use one of the most popular JavaScript stacks: the MEAN stack. One big benefit of the MEAN stack is that all of its components are free and open-source. There are also tons of resources available for learning the MEAN stack, and for debugging it when you inevitably encounter errors.
You can have a MEAN stack development environment up and running in the cloud in less than an hour, for free.
Here are the components we’ll use:
- MongoDB for our database
- Node.js and Express.js for implementing our API
- AngularJS, along with HTML and CSS (and Bootstrap) for our client-side application
- Mongoose to connect our application to MongoDB
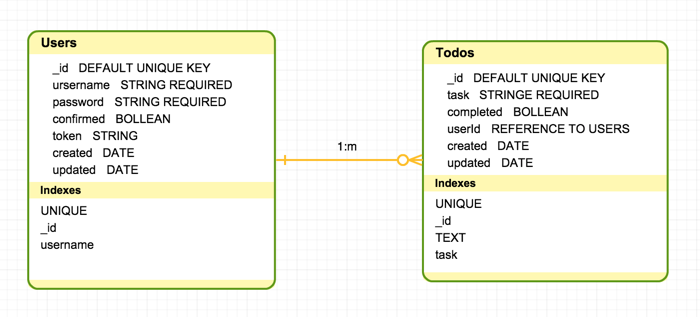
7) Design our database schema
It’s worth the effort to design a database schema, even for our simple application.
We’ll have two collections: our “Users” collection will house our user data, and our “ToDo” collection will house our tasks that need to be done. One user can have zero, one, or many tasks in her to-do list, so we will have a one-to-many (1:m) relationship between our two collections.
8) Define our use cases
- What happens to the to-dos related to a user that deletes her account? When the user deletes her account the to-dos related to that user should also be deleted.
- No to-do can be added without being attached to a confirmed user.
- A to-do can only be deleted by its owner.
- No user can be added with an empty username or password.
- No to-do can be added with an empty task.
Things to keep in mind:
- Use the Mongoose middleware to remove dependent documents like to-dos when a user deletes her account.
- Use Mongoose validation rules on models to prevent empty fields from being added to our database.
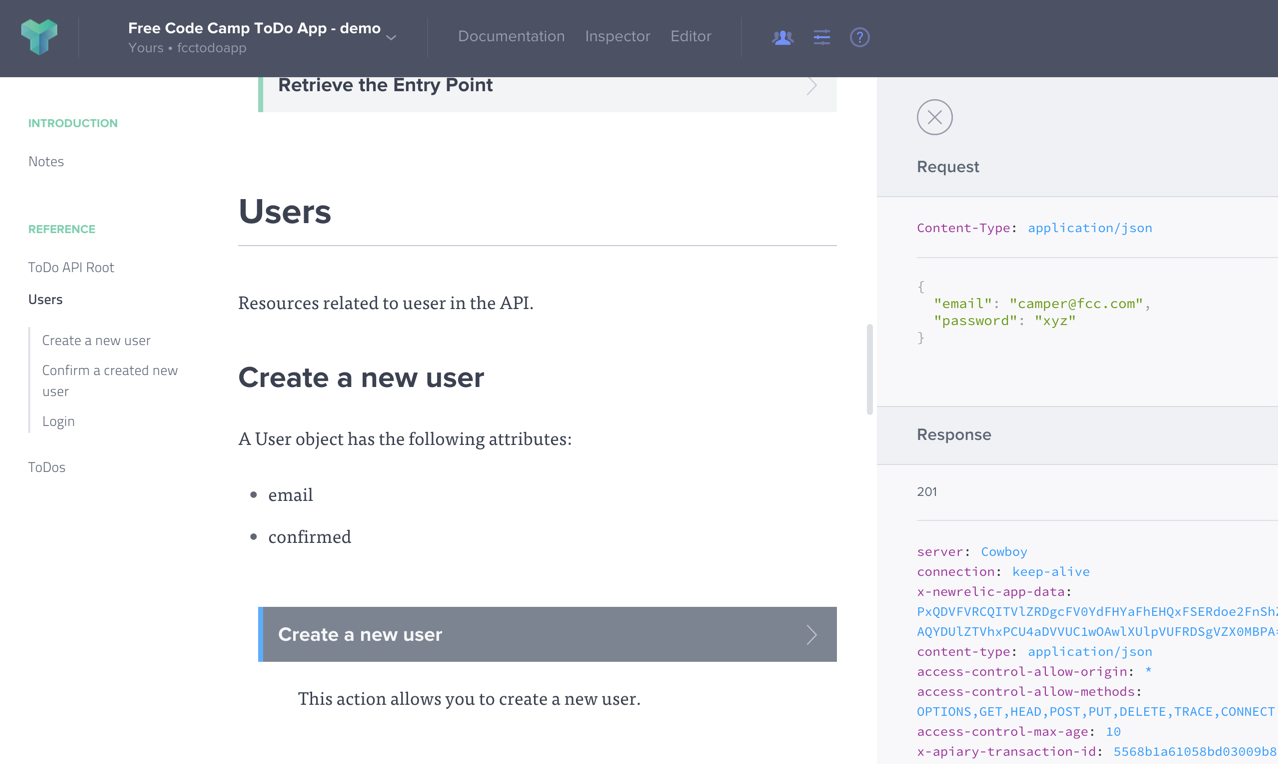
9) Design and test our API
I used a free product called Apiary to document our API.
Here’s the syntax I used to create this simple BluePrint.
I recommend you create an account and start playing with it. If you link your GitHub account with Apiary, you can ensure your documentation always stays up to date. You’ll also be able to test your data visually without the need for actually hitting your API endpoints. If you prefer to test your API from the command line, here’s an example of how to do this.
Later, once you’ve implemented your API with Node.js and Express.js, you’ll just need to set your URL in Apiary. Then you can start testing your calls. Our current host url (http://fcctodoapp.apiblueprint.org/) will be replaced by your API’s URL.
10) Start writing code!
This is the fun part, and it will take up most of your project’s time. If you need help with this, join us and learn to code.